Authentication is a critical part of any app. When you’re building an app, you’ll need to implement user authentication. To make things easier, I decided to create an authentication system using Next.js 13’s new App Router with the help of NextAuth as my starter template. This way, I can use it across all my next applications.

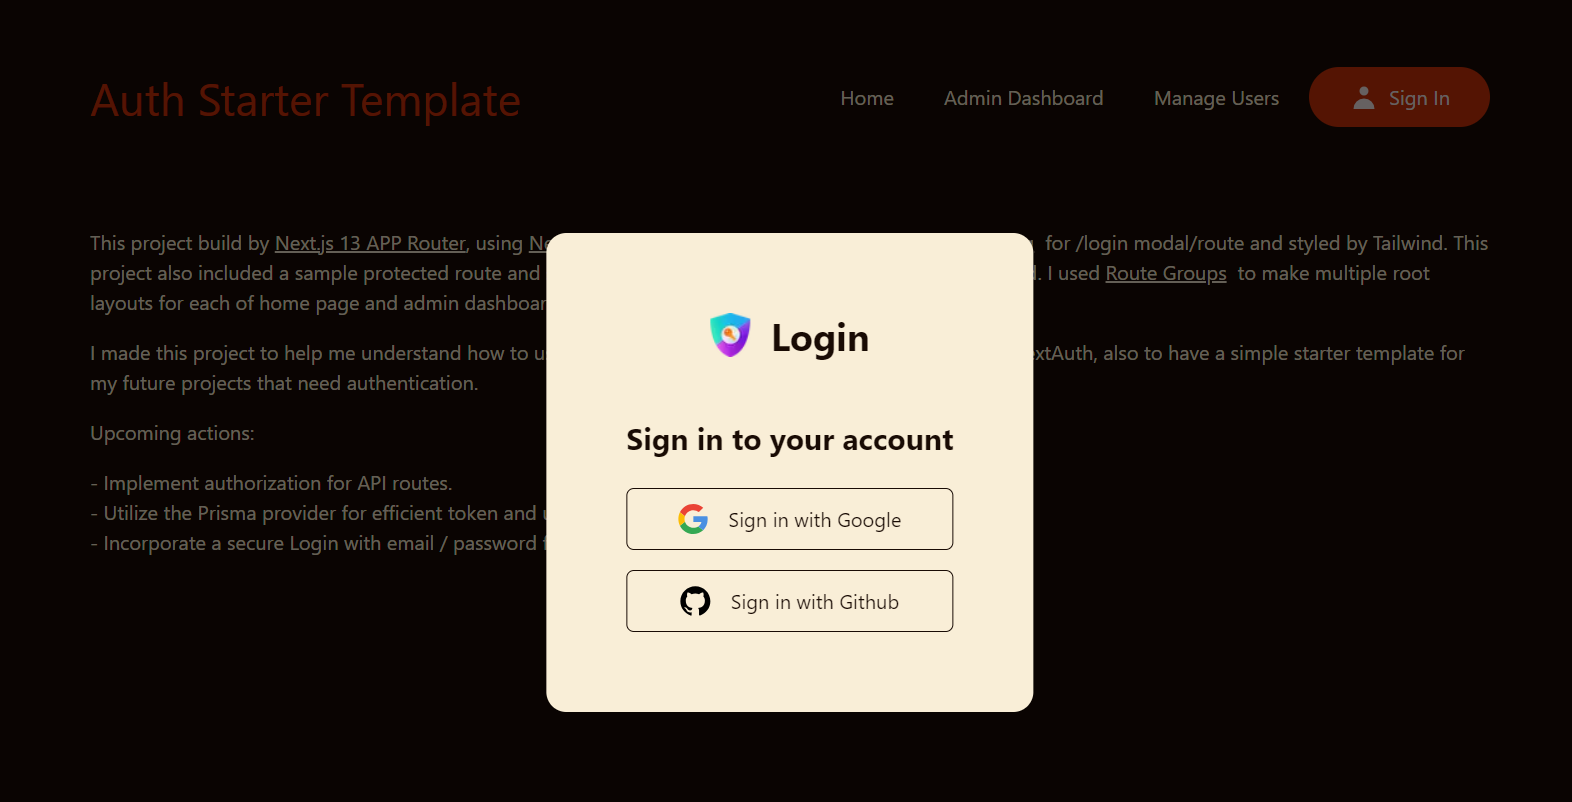
In this article, I’ll walk you through the basic steps, but if you are interested to learn more about Next.js 13 routing, my project’s source code are available on Github, for example by reviewing my repository you can learn about Modal Intercepting Route, Route Grouping to having Multiple RootLayout and Protected Route or Segment and all sub-segments.
The App Router
In version 13, Next.js introduced a new App Router built on React Server Components, which supports shared layouts, nested routing, loading states, error handling, and more. The App Router works in a new directory named /app.
Setup a Next.js project
Create a new Next.js project using create-next-app:
npx create-next-app@latest my-next-amazing-app
After running the above commnad you will get some prompts, We need to use TypeScript and App Router for our project, for the rest of options you choose whatever you would like to use.
Then install NextAuth dependency:
npm i next-auth
Add NextAuth to your API route
To add NextAuth to your project create a file named route.ts in the /app/api/auth/[...nextauth]/ address, if this folders do not exist just create it, This file contains the dynamic route handler for NextAuth.js which will also contain all of our global NextAuth.js configurations too.
Note: All requests to /api/auth/* (signIn, callback, signOut, etc.) will automatically be handled by NextAuth.js.
In /app/api/auth/[...nextauth]/route.ts route put the below codes:
import NextAuth, { NextAuthOptions } from "next-auth";
import GithubProvider from "next-auth/providers/github";
import GoogleProvider from "next-auth/providers/google";

export const authOptions: NextAuthOptions = {
  // Configure one or more authentication providers
  providers: [
    GithubProvider({
      clientId: process.env.GITHUB_CLIENT_ID as string,
      clientSecret: process.env.GITHUB_SECRET_ID as string,
    }),
    GoogleProvider({
      clientId: process.env.GOOGLE_CLIENT_ID as string,
      clientSecret: process.env.GOOGLE_SECRET_ID as string,
    }),
  ],
  secret: process.env.NEXTAUTH_SECRET as string,
};

const handler = NextAuth(authOptions);

export { handler as GET, handler as POST };
As you can see I imported just two Github and Google providers, But you may use other build-in OAuth providers that NextAuth support. In our authOptions object I also set the secret value, It’s a secret key string that NextAuth use it for session encryption. Generally in authentication system, after user logged-in to the application we need to create a secure session to maintain user login process, so NextAuth will create a encrypted session by using our secret key securely store session information in the server and a cookie in client-side browser.
The secret string value should be a long, random and confidential string and you can keep it in your .env file. You can create one by running the following command too:
openssl rand -base64 32
Now that we create our secret key and keep it in our .env file, NextAuth need another environmental variables named NEXTAUTH_URL to keep our project’s base URL:
NEXTAUTH_URL = "http://localhost:3000"
It’s a good practice to keep all your third-party secret and public keys and credentials in .env file too.
The mistake that I did
First time I did not set my secret value in my authOptions object, everything was looking good and my app working but every time I tried to login with Google or Github providers, after giving access to providers, providers site redirected me back to my app, but my session object was null, because NextAuth need the secret value to create and encrypt a secret session, so NextAuth return null as my session every time.
How to get Google or Github Credentials
For Google, Go to your GCP console, Create a new project or use one of your existing project, then go to APIs and Services > Credentials, hit Create Credentials and select OAuth client ID.
For Github, Go to your Github profile settings > Developer settings > OAuth Apps and create new OAuth App.
Then get your client and secret ID and save them in your .env file.
Use authentication session in your server rendered pages
import { getServerSession } from "next-auth/next";
import { authOptions } from "@/app/api/auth/[...nextauth]/route";

export default async function Home() {

  // Get user session token
  const session = await getServerSession(authOptions);
  // session = null || { user: { name, email, image } }

  return (
    <div>
      <h2>My Amazing App</h2>

      {session && (
        <div>
          <p>Signed in as {session.user && session.user.name}</p>
          <a href="/api/auth/signout">Sign out by link</a>
        </div>
      )}

      {!session && (
        <p>Not signed in</p>
      )}

    </div>
  );
}
Use authentication session in your client side pages or components
To retrieving session data in a client side components or pages you need to add NextAuth’s SessionProvider to your layout, then you can access session data by using useSession() hook in all your client pages. I did another mistake here and used SessionProvider directly in my root layout, and faced Error: React Context is unavailable in Server Components as layout.tsx is rendering in server but SessionProvider is a client side, to fix this we can create a client component provider.tsx with use client directive:
// provider.tsx
"use client";
import {SessionProvider} from "next-auth/react";

export function Providers({children}: {children: React.ReactNode}) {
  return <SessionProvider>{children}</SessionProvider>;
}
Then import it to our layout.tsx and wrap our children with our Providers component:
// layout.tsx
import {Providers} from "./providers";

export default function RootLayout({
  children,
}: {
  children: React.ReactNode;
}) {
  return (
    <html lang="en">
      <body>
          <Providers>{children}</Providers>
      </body>
    </html>
  );
}
Now we can access session in all our client components or pages:
// page.tsx
"use client";
import {useSession} from "next-auth/react";

export default function Home() {
  const {data: session, status} = useSession();
  console.log("status", status);
  console.log("session", session);

  return <div>Client Page</div>;
}
Full Source Code are available on my Github account.